Monday, November 29, 2010

Good Golly Green Bean Salad

IMG_6160

Some Thanksgivings I'm lucky enough to stumble across a recipe that becomes a keeper. This year I found this one -- Green Beans with Toasted Walnuts and Dried-Cherry Vinaigrette from bonappetit.com -- and let me tell you, it was TOTAL REDEMPTION for any other iffy dishes that might have also been served.

The beans are cooked but crisp -- the walnuts are toasted and the cherries are sweet -- the vinaigrette is made up of olive oil, sherry vinegar, shallots (although I just used finely chopped onion), salt, pepper, sugar, and (SURPRISE) fresh chopped mint. Sigh.

It is really fine if left to sit overnight so that the flavors mix and soak in to the beans, but don't deny yourself the wonderfulness that it eating this when it is first mixed together, so that the flavors come at you in a sequence. Really, it is amazing and not like anything I could imagine.

IMG_6139e

Again -- the recipe (and a photo of the assembled salad!) can be found here:
http://www.bonappetit.com/recipes/2010/11/green_beans_with_toasted_walnuts_and_dried_cherry_vinaigrette

Sunday, November 28, 2010

Seedy

IMG_6173e

Thank you all for understanding that we have taken the past few days off to enjoy Thanksgiving with our family and friends. (Not to mention that one of us has had a rather, um, larg-ish project going on right now...)

My recipe for Brussels Sprouts with Pomegranates and Vanilla Pecan Butter turned out to be absolutely gorgeous -- colorful and exciting -- but was the most iffy tasting dish on the table**. The only photo I got of the finished dish was a blurry cell phone photo (I forgot to bring my camera to my sister's house...aaaargh!) so I can't show you how beautiful it was. What I would do differently -- cut the brussels sprouts into halves or even quarters, parboil them for 8 minutes or so and then toss them in to roast them, add more pomegranate molasses (YUM!). However, my real inclination is that the recipe would be BEST made with an entirely different veggie, and I will be letting you all know how that works out, as I intend to give it a try!

Meanwhile, here's the trick to de-seeding a pomegranate:

Cut the crown off the fruit.
Just slicing through the skin, score it well from crown to base, making 4 - 6 cuts.
Put the fruit cut (crown) side down in a deep bowl of cold water -- let it sit for 10 minutes. (the only photo I got, of course. Sigh.)
Working underwater, pull the sections apart and roll the seeds right out into the water. They will sink to the bottom of the bowl and the white membrane will float to the top, where you can easily scoop it right off.
Drain the water off the seeds through a colander and enjoy!

IMG_6156e

**The Vanilla Pecan Butter, however, was a HUGE hit and people kept wanting to spread it on everything in site. It tasted like ice cream...or better. Mmmmmm...I can imagine it on fried apples, on cooked carrots, on scones ... you get the picture. And for THAT, Mr. Bobby Flay, you are still a hero in my book.

Tuesday, November 23, 2010

The Countdown Begins

2010 11 23_8928e

At the risk of losing all kitchen cred entirely, I'm not only going to admit that I still make a cranberry-jello salad at Thanksgiving, I'm going to admit that I really like it!

I've made this recipe for years and years (it's jotted down in a kitchen notebook dated 1995,and I'd already made it for several years at that time.) I got it from a friend who got it from a friend who got it from her mother-in-law who got it from her EX-sister-in-law and so on and so forth, so there is no way of knowing where this recipe actually comes from, but it is a good guess that after all this time the recipe has undergone some changes. At any rate, it is dense and packed with real live fruits and vegetables and nuts that are (except for the pineapple) fresh and relatively healthy, and the jello just kind of holds them all together.

We will not discuss the sugar.

(Except have you ever tasted a raw cranberry WITHOUT sugar? Don't. Just a wee bit on the tart side, you might say...)

I like to make this as early as I can, even as early as the Tuesday before Thanksgiving -- it really needs a good 24 hours at least to be at it's best.

1- 12 oz package cranberries
2 cups sugar
2 large boxes (or 4 small boxes) jello -- I use cranberry jello, raspberry, cherry -- whatever is red.
2 cups hot water
1 cup cold water
1 can crushed pineapple, drained, with juice reserved (NOTE - my recipe doesn't specify what size can -- I usually get a large one and use about 1/2 to 2/3 of the pineapple and eat the rest with cottage cheese.)
1 cup chopped pecans
2 cups finely chopped celery
1/2 orange peel, grated finely
2 Granny Smith apples, chopped finely

Before you begin, remember that cranberries are very red.  They also stain, so don't be using your favorite white kitchen towels to mop up any spills.  Wear an apron or an old shirt to make this one!  You will need a couple of large bowls and a food processor.

Wash the cranberries well under cold running water, sorting out any that have gone bad.  Using a food processor, grind the cranberries and orange peel together. Add the sugar and set aside.

Dissolve the jello mix in hot water. When well dissolved, add cold water and other ingredients.

Do you still have a jello mold? Second secret -- I still have a ring mold that I keep just for this recipe for Thanksgiving. It holds a bit more than half of this recipe, and I just pour the rest into a small square casserole dish.  You could use a large rectangular casserole dish if you wanted, but then you'd be missing out on the fun of a jello mold.

Chill until firm (at least overnight.)

Note -- you can reserve the juice from the pineapple and add enough cold water to reach the required 1 cup to substitute for the cold water.

And, there you go.  One tradition continues on...

Monday, November 22, 2010

Paging Mr Bobby Flay, Paging Mr Alton Brown

Okay peeps, get a load of this:

2010 11 21_8851ec

Brussels sprouts still on the stalk. I got them, um, yeah, I got them because I think they'll keep until Thanksgiving better than the others. Yeah. That's right.

That was my excuse anyway, when we picked them up at the market yesterday. And then, of course, Doug busted me on that one.

He said,
"So, you've just really always wanted to buy them like that because it's kind of weird looking."

"Um. Okay, you're right. STILL, I think they'll stay fresher longer."

"And I bet you're going to take a picture of them, aren't you."

"Um. Well, I might, now that you mention it. Actually that might be a pretty good idea. I'll think about it. And I STILL think they'll stay fresher."

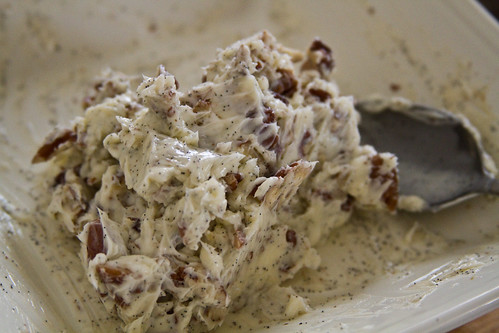
Dear reader, I have no idea if they will stay fresher. But they are kind of cool looking, right? And I got them because one of the new recipes I will be trying out this Thanksgiving is Roasted Brussels Sprouts with Pomegranates and Vanilla-Pecan Butter, courtesy of Mr. Bobby Flay from the Pioneer Woman's Thanksgiving Throwdown episode.

If you take a look at the recipe, you will see that one of the ingredients is Pomegranate Molasses. Yikes! I went to all of my favorite gourmet markets and fancy-schmancy places I could think of to find them and no one seemed to know what I was talking about. People kept directing me to pancake syrups, so I would look there; I looked in juices and jams; I looked in ethnic aisles, as Pomegranate Molasses are a typical Middle Eastern ingredient. No luck.

I had found a recipe, thank you very much most wonderful Mr. Alton Brown, to make pomegranate molasses at home, since they are difficult to find. And THAT is what I did, er, attempted to do, today.

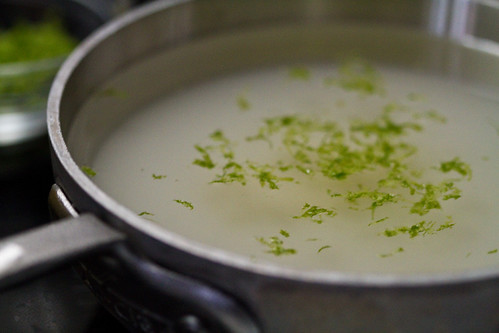
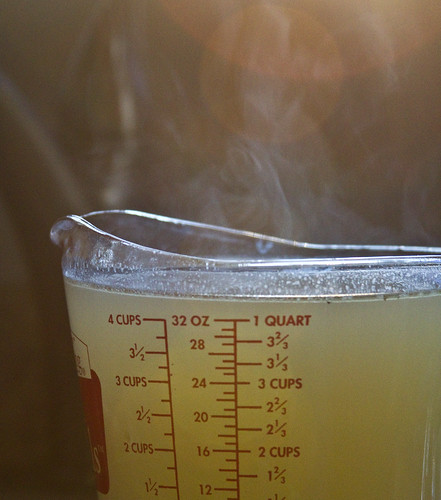
It sounds oh so simple. Four cups of pomegranate juice, some sugar, some lemon, cook on medium high until the sugar is dissolved, turn down the heat and cook on medium low until it is reduced down to one cup, approximately 70 minutes.

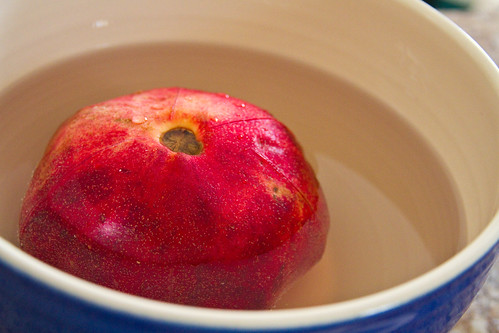
I had qualms about the whole thing beginning with pomegranate juice itself. I was sure to get REAL juice, not from concentrate, and tried not to visibly wince at paying a little over $7.00 for a bottle of juice. I expected something beautiful and clear and ruby colored -- you know, kind of like cranberry juice cocktail; instead the juice was a bit thick and opaque and, well, an off shade of pinkish gray that I didn't particularly like. I tasted it -- not yummy in my book, but no real whang, either. Just to be sure, I did an internet check on the pomegranate juice taste tests and found that a lot of people think that pomegranate juice in general tastes fishy.

The bar on my expectations was lowered quite a bit at this point. If you are in the southeastern United States and heard a soft thud, THAT was my bar. Lowering.

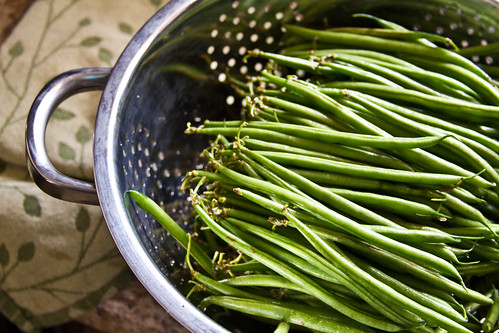
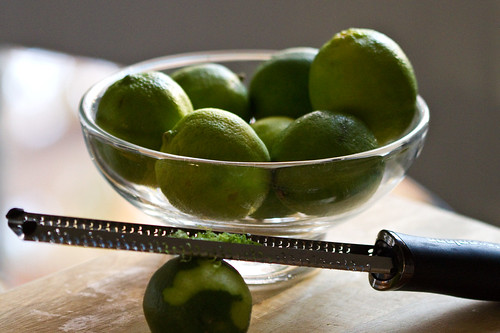
Once I actually started cooking, I was faced with another dilemma. How in the world would I be able to tell if the juice had reduced down from four cups to one cup? I needed something food proof and heat proof that I could stick in the pan to measure the juice level.

2010 11 22_8915e

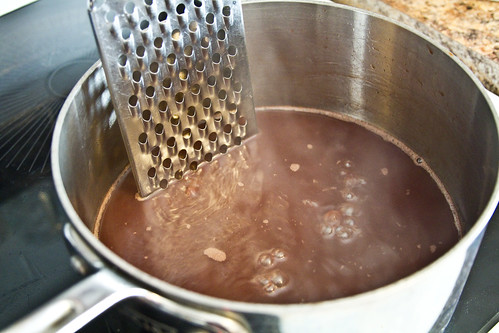
Don't laugh. It worked. I just counted the holes and started cooking.

Problem number three.

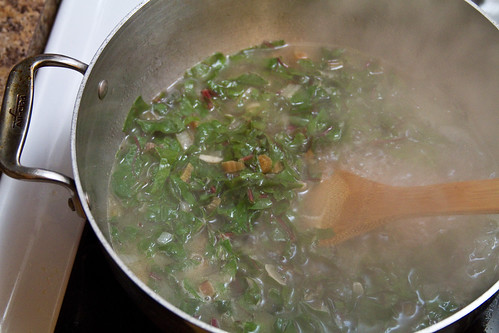
At the end of 70 minutes of cooking on medium low, my mix had hardly reduced AT ALL. My stove is electric,and I'm betting that Mr. Alton Brown (who I dearly love) has a gas stove, which might account for the difference. So I turned the heat up until the mix simmered slightly and kept on cooking. At the end of 60 MORE minutes, it looked like I was nearly there.

And that's when it all broke loose.

2010 11 22_8919e

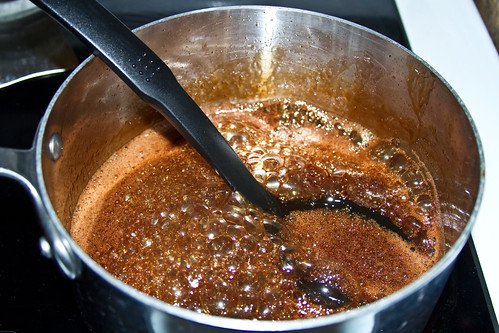
Within moments some mystical line of heat and sugar was crossed and the simmer turned into a froth of bubbles that didn't break back down into the syrup, but rose and mounted higher and higher in the saucepan until I could not EVEN SEE how much syrup there really was -- not even with my handy dandy cheese grater measuring device. And that's when I realized things were quickly progressing from pomegranate molasses to pomegranate brittle and I'd better get the saucepan off the heat and I mean right now and that's exactly what I did and not a moment too soon.

Whew.

UNFORTUNATELY, when I spooned the mess molasses out into the jar, the jar that should have held exactly one cup, the amount fell far short of the mark. I had fallen into the trap of over reduction.

That's when I grabbed my car keys, and in a desperate attempt to save my last chance of making Mr. Bobby Flay's wonderful throwdown Thanksgiving Brussels Sprouts, I drove two whole miles to a little Mediterranean market (that I'd never been into before) where I walked into the store, down the very first likely aisle, straight to - wait for it - real pomegranate molasses.


2010 11 22_8926e

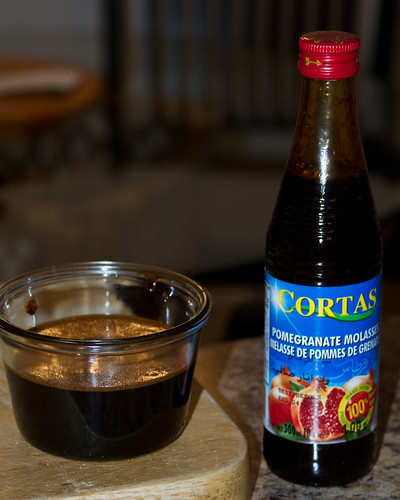
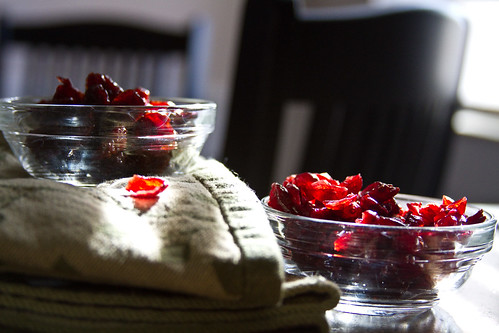
On the left, homemade pomegranate molasses (taffy), costing over 2 1/2 hours of time and about $8 in ingredients.
On the right, the wonderful store bought pomegranate molasses, bought for
$3.54 -- you heard me. Three and a half dollars WITH tax.

Gotta love the holidays!

On more time -- here's the recipe for Mr. Bobby Flay's Roasted Brussels Sprouts with Pomegranates and Vanilla-Pecan Butter
http://www.foodnetwork.com/recipes/bobby-flay/roasted-brussels-sprouts-with-pomegranates-and-vanilla-pecan-butter-recipe/index.html
(I will let you know at the end of the week how this one turns out!)

and here's Mr. Alton Brown's recipe for Pomegranate Molasses, which are probably wonderful when cooked by someone who knows what he/she is doing.
http://www.foodnetwork.com/recipes/alton-brown/pomegranate-syrup-or-molasses-recipe/index.html

P.S.  I WILL try making this again, by the way.  It's a matter of principle.

Sunday, November 21, 2010

Roasted Red Peppers

Okay, we'll admit it. This weekend and the next few days leading up the Thanksgiving aren't so much about cooking as they are about the prep work.

(At my house, there is a point when it is all about getting the refrigerator cleaned out enough to hold all the groceries that are being brought in, but that's another story and one I most likely won't be telling.)

Anyway...ahem...back on subject here ... this post is NOT about Thanksgiving day prep work. At least not for me. I had considered making a Corn & Roasted Red Pepper Chowder, but realized we were cooking too much, so it got dropped off the menu. Of course, I'd already found wonderful Italian Red Peppers at the farmers market, and I can't let them go to waste. So, I have decided to roast them anyway and freeze for later use. (One snowy day in January I will thanking myself for this, I just know it.) Some recipes call for roasting the pepper whole over an open flame, whole in the oven, etc, but THIS is by far the EASIEST way to roast peppers, and it works just as well.

2010 11 17_8845e

I should point out that I was lucky enough to find Italian Red Peppers, which have a thinner skin and flesh than Red Bell Peppers, and are (in my opinion) more flavorful. They are really the perfect red pepper. But regular bell peppers roast the same way. The main difference is that you would roast the thinner Italian peppers for a bit less time.

2010 11 21_8871e

Start by washing the peppers well, of course, and cutting off the stem end. With the Italian peppers I cut off both ends. Pull out the seeds AND that white membrane that runs down the entire length of the pepper.

2010 11 21_8865e

I like to make a few cuts at the narrow end of the pepper so that it lies flat. (Don't make your cuts too long, or you'll have to get all fussy at the end when you're pulling off the skin.)

2010 11 21_8861e

And here's my way to make it all easier -- you're going to lay the peppers out on a cooking sheet. I like to cover the sheet with aluminum foil (pepper juice and oil under the broiler can be TOUGH to clean up) and brush a tiny amount of olive oil all over the foil. My favorite little tool for this is a silicone pastry brush that I use for just about everything -- except pastry, of course.

2010 11 21_8872e

(Attention: the above photo is entirely gratuitous. I don't know why I'm including it, except that I just kind of like it.)

I guess I should have told you five minutes ago to turn on the oven. Oh well. Move the top oven rack as high as it will go, and turn the broiler on to 500 degrees. Let it get all hot in there for about five minutes.

Now, we're caught up.

Put the pan in under the broiler and cook for about 5 minutes. The skin will start to blister and turn black in spots. You will probably have to turn on your exhaust fan about now...

2010 11 21_8878e

Pull the pan out and turn it around so that the peppers all get equal time under the hottest parts of your broiler unit, and roast for about another 5 minutes. If you are using Italian Red Peppers it may be more like 3-4 minutes each way.

Note -- at this point you might need to take the batteries out of your smoke detector. It gets a bit exciting there at the end, you know.

'Nother Note -- please don't forget to re-insert those batteries as soon as possible.

As soon as you pull the pan out of the oven, throw a nice thick folded dish towel over the whole thing and go do something else for a while. This helps steam the peppers while they cool down. This is an important step, okay?

2010 11 21_8890e

Once the peppers are cool, gently peel the skin right off and they are ready to use. You can use right away, stick them in the refrigerator for three days or so, OR you can do what I did, and freeze them. (I just put a little olive oil on a piece of plastic wrap, stacked three peppers up whole, put them on the oil, turned them over once so they were lightly coated with oil, and folded the plastic wrap into a neat little bundle. I ended up with two packages of three peppers, which I then put into a labeled zip-lock freezer bag. One book says you can freeze for two months, another says three; I don't know why you couldn't keep them longer, but that's just me.)

Thursday, November 18, 2010

Meditteranean Style Chicken

2010 11 18_8814e

Uh-oh. We are experiencing teck-ni-kul difficulties...

SO, tonight I have to bring you photos of LEFTOVERS rather than the real thing.

But, here's how to make the real thing, which is fast and awesome, okay?

2 boneless / skinless chicken breasts, cut into bite-sized cubes

Thoroughly film the bottom of a very large skillet with olive oil, and warm (over medium low heat) 4 or 5 peeled garlic cloves.

Once the garlic is beginning to soften, add the chicken and turn up the heat. Quickly sear the chicken in the oil for several minutes, just until it begins to turn from pink to white, and then toss in some fresh rosemary (about 3 or 4 sprigs, to taste). Season with a sprinkle of salt and fresh ground pepper, and continue to saute for several more minutes.

Stir in
1 can artichoke hearts (drained)
1 small can sliced black olives (drained)
1 can diced tomatoes (I used the ones with garlic - yum!)

When bubbly, add in about 1/2 cup RED wine and 1 1/2 cup chicken broth.

Cook for about five minutes more, until the chicken is done.

In a heat proof cup, mix one heaping Tablespoon flour with a couple of Tablespoons of water, stirring until the mix is smooth and well blended. One spoonful at a time, add hot liquid from the skillet to the flour / water mix, stirring the entire time so that the flour doesn't cook and clump. Once the flour mix has is well diluted and very hot, stir it into the skillet mix and cook just until thickened a bit.

Serve over angel hair pasta, with couscous, OR over toasted slices of polenta.
Makes 4 servings.

Enjoy!

(And next time I'll try to remember to put a memory card in my camera ...)

Wednesday, November 17, 2010

I'm Not All That Sweet

Confession: when I was a kid, and Thanksgiving rolled around, I deliberately avoided all the orange items on the menu. Turkey...excellent. Dressing...fantastic.

Sweet potatoes...blech.

It took me years to try them again, because I always associated them with the sickly sweet casserole that my grandmother always had on the buffet. It was just too much - they're SWEET potatoes, for heaven's sake - do they really need all that extra sugar?

*please note...if you like all that extra sugar, please don't use this "recipe." It has some sugar...just not as much as is typically used...it's really just a nod to the traditional sweet potato casserole.

So, here we go...

Sp1

Bake up a bunch of sweet potatoes. I realize that's non-specific, but it depends on the size of the potatoes and the size of your crowd. I used about five, I think. Scoop out the flesh and place in a large bowl. Add some butter and mash with a fork or a potato masher if you have one.

I have one.

In Knoxville.

sigh...

Now - most recipes would have you dump a ton of sugar and eggs and vanilla and other stuff into the mashed sweet potatoes, but I'm going to make your life easy.

Don't do it. They are delicious and they don't need all that stuff. A little butter is all you need at this point.

Put them into a lovely shiny aluminum casserole dish because you've packed all your real ones away, and spread them into an even layer.

Sp3

Sorry for the crazy iPhone photos, but I a) couldn't find my camera, b) got a new iPhone camera app, and 3) I'm in an iPhone photo show tomorrow so I'm showing off.

Okay. Now dump about a cup of brown sugar, a half cup of flour and about 3/4 of a stick of butter into a bowl and use your pastry cutter to mix them together.  Or you can be like me and use a fork again.

My pastry cutter is actually not in Knoxville.

I don't have a pastry cutter.

Sp4

Mix it together well and layer it over the top of the potatoes. (See...I told you there would be sugar!) You can also add some chopped pecans to this layer if you like them. I don't like them. So I don't. If I were cooking for my dad, though, I probably would.

Sp6

I know what you're thinking..."Diahn! How on earth will your casserole stay together without eggs? Impossible!"

No. Not impossible. It works just fine. Potatoes stick together like nobody's business.

Put this in a 350 degree oven for about 30 or maybe 45 minutes, depending on your oven. You just want to warm the potatoes thoroughly and get the brown sugar/butter/flour mixture to get nice and crispy on top.

Sp8

Mmmm...see that right there? That's all the sugar you need...a perfect complement to the sweet potato!

Serve it up with your turkey and dressing and cranberry sauce and that weird pink gelatin salad thing with the mandarin oranges in it.

Or just throw it on a plate with a salad and some pumpkin bread and call it Tuesday night dinner.

Sp9

Yes. I know that's how we served up the zucchini...but when it works, it works!

Tuesday, November 16, 2010

Crazy Mixed Up Eggs Omelet Sandwich

It's cold, it's raining, it's late. It's DARK.

Ugh. It's one of those nights when all good intentions run under the furniture to hide out with the dust bunnies for a while. It's one of those nights to just settle for whatever for dinner.

Uh, or not. Let the good intentions canoodle away with the dust bunnies -- that just means it's a good night to crack some eggs and take five minutes to make dinner. I'm talking omelets now...

omelet-1

Start out with real butter melting in a non-stick skillet over medium-high heat. Here I've thrown in a couple of thin slices of ham, torn up into bits, along with some fresh chives and tarragon that I rinsed and snipped with scissors right over the pan. Stir everything around in the hot butter until the butter begins to bubble. Don't let it turn brown...

Note -- a few fresh herbs just hanging around, either in the a little vase of water in the fridge or in a little pot on the windowsill over the sink, really help make otherwise "blah" cooking ... well ... not so blah. You know what I mean. And please, tarragon with eggs? We're talking soul mates here, people.

omelet-2

Meanwhile, in a bowl, using a fork, beat the tar out of two eggs. (That's southern for "beat two eggs until extremely well beaten" by the way...) I like to get a good froth going, as that seems to make the eggs cook up fluffier and lighter. Pour the eggs into the pan with the hot butter, which should be sizzling around the edges of your pan by now.

omelet-3

It's late. I'm tired. I don't really so much care that my omelet is perfect looking (which is why I usually just do what we call "crazy mixed up eggs") so I scramble the eggs around just for a few seconds before piling them all together in a nice solid shape in the middle of the pan. Put a handful of finely shredded cheese on top, and let it just sit for a minute.

Fold the whole thing over (be as untidy as you like) and -- here's the beauty -- put in between two pieces of lightly toasted bread. You got it -- an omelet sandwich.

And suddenly "settling for whatever for dinner" doesn't apply anymore.

Monday, November 15, 2010

The Great Pumpkin

Pumpkin Bread

Okay. More bread. So sue me.

Honestly, though - this is the very best pumpkin bread on the entire planet. When I made this batch, the boys and I had a loaf for lunch. Well, we left about a quarter of it for Dr. SmartyPants to eat later, BUT WE ATE THE OTHER THREE-QUARTERS FOR LUNCH. That's all.

When I make this bread, I tend to eat it for breakfast (with a little cream cheese...yum), lunch (with an apple) and dinner (with a salad and that zucchini) and dessert (all by itself.)

So it doesn't last very long...

My friend, Kristi, gave me the recipe for this after Derek and Joshua begged me to ask her to make them some. It's so easy, and so moist and so delicious and so I'll just get on with it...

Preheat oven to 350

Mix together the following ingredients in a large bowl. A nice large stand mixer is fantastic for this, but in a pinch a hand mixer will work just fine...just make sure you have a good, deep bowl - there's a lot of batter.


3 cups sugar (yes...that's correct...there's a reason it tastes so good...)
1 cup oil
4 eggs
1 can of pumpkin (not pumpkin pie filling...just plain pumpkin!)
3 1/2 cups of flour
1 tsp baking powder
2 tsp baking soda
2 tsp salt
1/2 tsp cloves
1 tsp cinnamon
1 tsp nutmeg
1 tsp all spice
1/2 tsp vanilla
2/3 cup water

Bake in 2 greased loaf pans for 1 hour.

That's it. Really. For this last batch, I baked it in 3 small loaf pans...worked just fine that way, too!

My only caution to you is to watch it in the last 15 minutes or so - you do NOT want to overcook this bread. It's best when it stays good and moist - don't let it dry out, okay?

Ohmygosh. I'm going to bake some right now...

Sunday, November 14, 2010

Lime Sorbet

Confession.

You may not believe this, but I don't really like ice cream. I've found that I love to make it, because there are so many fun and surprising flavor combinations possible; but, in general, ice cream is just too heavy and rich for me.

I DO love sorbet, though.

No matter how cold it is outside -- I love sorbet, and LIME SORBET is my favorite.

So, for this recipe you will need an ice cream maker. If you don't have one, ask around, because it is highly likely that you will find a friend who has one sitting neglected in the back of a cabinet somewhere. Borrow it, wash out the spiderwebs, and see what you think about making your own frozen goodness.

If you decide to buy one, (and your friend won't give you hers or sell it to you cheap) plan on spending about $50 for the counter top models with the container that has to be frozen in order to make the ice cream. I have a Cuisinart and couldn't be happier with the results I get.

lime sorbet-2

Look at these limes. Beautiful AND delicious.

Irresistible.

After much research and some trial and error, I finally found a great recipe for Lime Sorbet (from eatingcleveland.com) that sounded right up my alley. A couple of easy tweaks to make it exactly what I was looking for, and the result is something that I keep in my freezer all the time.

Please don't let limes ever go out of season.

You will need
  • One bag of limes (or, at least 7 -8 nice sized limes)

Start by washing the limes really well. Pick out one or two limes with the best skin. These are the limes you will use to get
  • a (generous) Tablespoon of zest.

lime sorbet-4

I used to use a little zester that peeled it off in strips that were always much too thick and would often even include a bit of the white pith (which is terribly bitter and sour.) Then I treated myself to a microplane zester.

Oh. My. Goodness. Let us pause for a minute...

(Dear Santa, If anyone of these lovely readers does not have a microplane zester, please be sure to bring them one for Christmas. Thank you very much and amen. Love, Linda)

lime sorbet-3

See how lovely and fine the zest is? It is practically perfect in every way. Note -- when you use your zester, hold the fruit underneath and the zester on top. That way, the zest stays right there on the tool until you are ready to tip it over your little bowl and neatly pour it in.

Next, roll the limes around on the counter a bit to loosen them up. Cut in half and juice until you have
  • a cup of lime juice. The number of limes you need will vary, depending on their size and how juicy they are. It took me seven limes to get enough juice this time.

Note: If you have leftover limes and don't plan on using them for anything else, feel free to go ahead and juice them and freeze the juice to use later on in a later batch of lime sorbet.

I have an electric juicer, but normally use a regular glass or plastic juicer for this small of a job. There's something nice about getting your hands all sticky and citrus-y smelling.

lime sorbet-5

You can even just smash and squeeze the limes without any equipment, but that might be too much like work.

Now that we have our little dish with lime zest and your cup of lime juice ready, we can move over to the stove where we'll make our simple syrup.

lime sorbet-6

In a small saucepan (and, again, I love the kind with rounded sides) pour in:
  • 2 1/4 cups sugar and
  • 2 cups water along with
  • about 1 teaspoon of your lime zest.

Heat over medium heat, stirring nearly constantly, until the sugar is completely dissolved and the syrup is clear. You want the sugar really dissolved -- no gritty feeling on the bottom of the pan -- but you don't want to keep cooking and cooking until you stop making sorbet and start making candy. That would be a different recipe entirely.

Pour the syrup into a medium bowl, stir in the cup of lime juice and the rest of the lime zest.

Here's where I add my own trick ingredient, which adds a nice depth of flavor and keeps the sorbet from freezing into a rock in the freezer. Stir in:
  • 1 shot Triple Sec.

Cover the mix, and refrigerate until nice and cold.

Once the mix is cold (and I usually let it chill at least overnight) freeze the sorbet according to your equipment directions. Pack into a covered container and freeze for an hour or two to harden a bit before enjoying.

lime sorbet-1

Go away cruel world. Hello sweet taste of summah-tiiime. Yum.

Most recipes state that homemade ice creams and sorbets keep in the freezer from one to two weeks, so that's the general rule of thumb I use, too.

Saturday, November 13, 2010

Feeling Corny

You know..for me...it's all about the carbs, man. I can make a meal out of nothing but bread and side salad and be quite happy. Bread makes my heart go pit-a-pat. Bread makes me weak in the knees. Bread is the single most important ingredient to any good meal.

I eat bread...therefore I run.

I made some cornbread to go with the chili the other day, and then realized that I'd need cornbread for the Thanksgiving dressing, if I can remember all the things that go in the dressing that my grandmother makes (I think I can...I think I can...), so I thought I'd share a basic cornbread recipe with you.

Even though everyone already knows how to make cornbread, right?

Well, that's too bad. I don't have anything else ready. We ate at the Talky Beer Place on Thursday, and at Potbelly last night, so I haven't cooked anything in two days.

So, here we go...

corn meal

Start with a good corn meal. This is self-rising, because I'm too lazy to add the extra steps. But it's better than a box of Jiffy. Although - really...I like Jiffy. But not for dressing.

Add some oil or shortening to a cast iron skillet and heat it up on the stove, or in the preheated 450 degree oven while you mix the rest. This ensures that you get a good crust on the bottom of your bread. DON'T SKIP THIS STEP.

skillet

The only cast iron skillet I currently have is this grill pan, but it works just fine.

Dear Mom: See Christmas list suggestion above...

Tangent...My sweet Dr. SmartyPants thinks it's really disgusting that I won't let him wash this pan with soap. It's not. Good hot water and a scrubby are all you need. Please, please, please oil your pan before you put it away...Tangent done.

In a bowl, combine 2 cups of the self-rising corn meal with 1 tablespoon sugar (if you like a little sweetness...leave it out if you are weird don't.)

In another bowl, or large measuring cup, combine 1 1/3 cups milk with one slightly beaten egg. Or if you're like me, drop the egg in and give it a swirl to mix it up with the milk. ***edit...I just remembered...I used about one cup of buttermilk and 1/3 cup sweet milk when I made this...yummmm.

eggs

Add the wet ingredients to the dry and stir until smooth.

Pour the batter into the hot skillet.

batter

I usually let it sit a minute to let the crust get all crunchy. I like crunchy crust.

Say that five times really fast. Ilikecrunchycrust. Ilikecrunchycrust. Ilikecrunchycrust. Ilikecrunchycrust. Ilikecrunchycrust.

Oh, never mind. It wasn't all that hard to say after all.

crust maker

Pop it into the oven and bake for about 20 to 25 minutes, until the top is golden brown.

Turn it out onto a cooling rack and guard it with your life, because someone in your house wants to grab it, slather it with butter and call it his.

And if you only have a cast iron grill pan, like me...enjoy the cute little cornbread bottom.

grill crust

(ilikecrunchycrust)

Friday, November 12, 2010

Well, I'll Be Chard

Have you seen the new nutritional scoring system (NuVal) at the grocery store lately, where the item is scored on a scale of 0 to 100, with 100 being the very best? Well, I found something beautiful that ranks a full "100".

swiss chard soup-03

Swiss Chard.

Gorgeous, huge deep green leaves in thick bundles, with stems of red (or white or yellow or green -- or even mixed) -- how in the world could I resist this stuff? I mean, as an artiste, of course.

As a cook, however, I was stumped. For one thing, I just couldn't find a lot of recipes out there for chard. And then, most of the recipes I did find were absolutely loaded with butter, cream, AND cheese. Finally, I really wanted to make soup.

Where did THAT leave me?
I'll tell you.
I looked up the basics of cooking chard in my old stand-by, Fannie Farmer's Boston School Of Cooking Cookbook, and then just went on from there. In other words, I backed up and punted. I winged it. And it worked.

swiss chard soup-01

Begin with a nice fresh bunch of chard. You will want to wash it gently but really well, because, like most greens, there will be some sand hanging out in all those nice little cracks and crevices.

Sand is organic, but not necessarily all that good for you. Just a thought...

swiss chard soup-02

Here's the thing about chard. The stems are thick, kind of like celery, and healthy yummy edible -- but they need to cook longer than the leaves. The trick, therefore, is to cut off the stem ends, chop them up fairly thin (I'd say 1/3" to 1/4" thick), and set aside.

Then...
swiss chard soup-04

...cut away the center rib (to the trash or compost it goes!) so you can chop up the leafy green bit separately.

swiss chard soup-05

I like to gather the greens together and roll them all into a nice tight roll, and then make 1/2" to 1" thick slices with a very sharp knife. Don't be wimpy about this, and the knife needs to be sharp enough to slice, not saw. (Keep your hand far away from the knife. Don't cut yourself, PLEASE.) Then I turn the cutting board, gather the strips together, and slice again so that I have a pile of green rectangles.

Of you can just chop them up however is easiest for you, because they are going to cook down by the end and it really doesn't matter all that much.

Now we're cooking.

In your saucepan (and I love to use a good heavy huge pan with curved sides) melt 1 Tablespoon of butter and 1 Tablespoon of olive oil together.

When your fats are nice and bubbly, add your chopped STEMS (not the greens yet!!!) and one chopped onion. Stir them around for a few minutes on medium heat, then add about a cup of chicken broth (and here is where you get to use our now-famous-cheatin'-broth) and 1/2 cup of water, put the lid on the pot, and simmer over medium to medium-low for about 20 minutes, stirring every now and then.

swiss chard soup-07

The red stems are a little disconcerting at this point, I think. The green and white stems may make a prettier soup in the end, but the red is perfectly fine.

You will want your stems to become nice and tender.

swiss chard soup-06

Pour in 3 1/2 to 4 cups of cheater's broth, bring it up to a simmer, and then...

swiss chard soup-08

...add your chopped greens. Stir it all around until the greens wilt down into the soup, add a little wine (or lemon juice!), cover, and simmer for about 15 - 20 minutes on medium to medium-low heat.

See why I love the cheater's broth? The seasonings are already there. Easy peasy. I LIKE easy.

swiss chard soup-09

After about 15-20 minutes, when the greens are nice and cooked, you want to add a can of Cannellini beans (white kidney beans) that have been GENTLY rinsed. They are delicate beans, so don't mistreat them. Be gentle. Stir carefully. Be kind to them, and they will repay you in turn. (If you've never tried Cannellini beans, you are in for a real treat. They have become my favorite all around bean, and I keep several cans in the pantry all the time.) Keep the soup on the heat just long enough to get the beans heated through -- just a few minutes should do it.

swiss chard soup-10

This is the most difficult part. Prepare to completely panic. You need to taste the soup to adjust the seasonings, but at this point is TASTES TERRIBLE. Well, maybe not terrible, but it just tastes kind of like the juice than runs off greens after cooking, with maybe more seasonings. You will freak out. You will be tempted to call your soup a failure and phone out for pizza instead.

But... Don't Panic.

Dish your soup into the bowls. That's where we're going to let a little thing called "cheese" -- specifically "shaved Parmesan cheese" -- work its magic.

Pile a big pile of shaved parm onto the soup, let it sit for a minute to get nice and soft, and then stir it in.

swiss chard soup-11

Magic.

Now -- since this is, um, an evolving recipe, I would love to hear any suggestions any of you might have! I'm open to playing around with it.